
Map a property's history
Reconstruct a parcel across the centuries: where it was, who owned and farmed it, and every sale, succession or division that reshaped it — each fact anchored to a source.
How it works
-
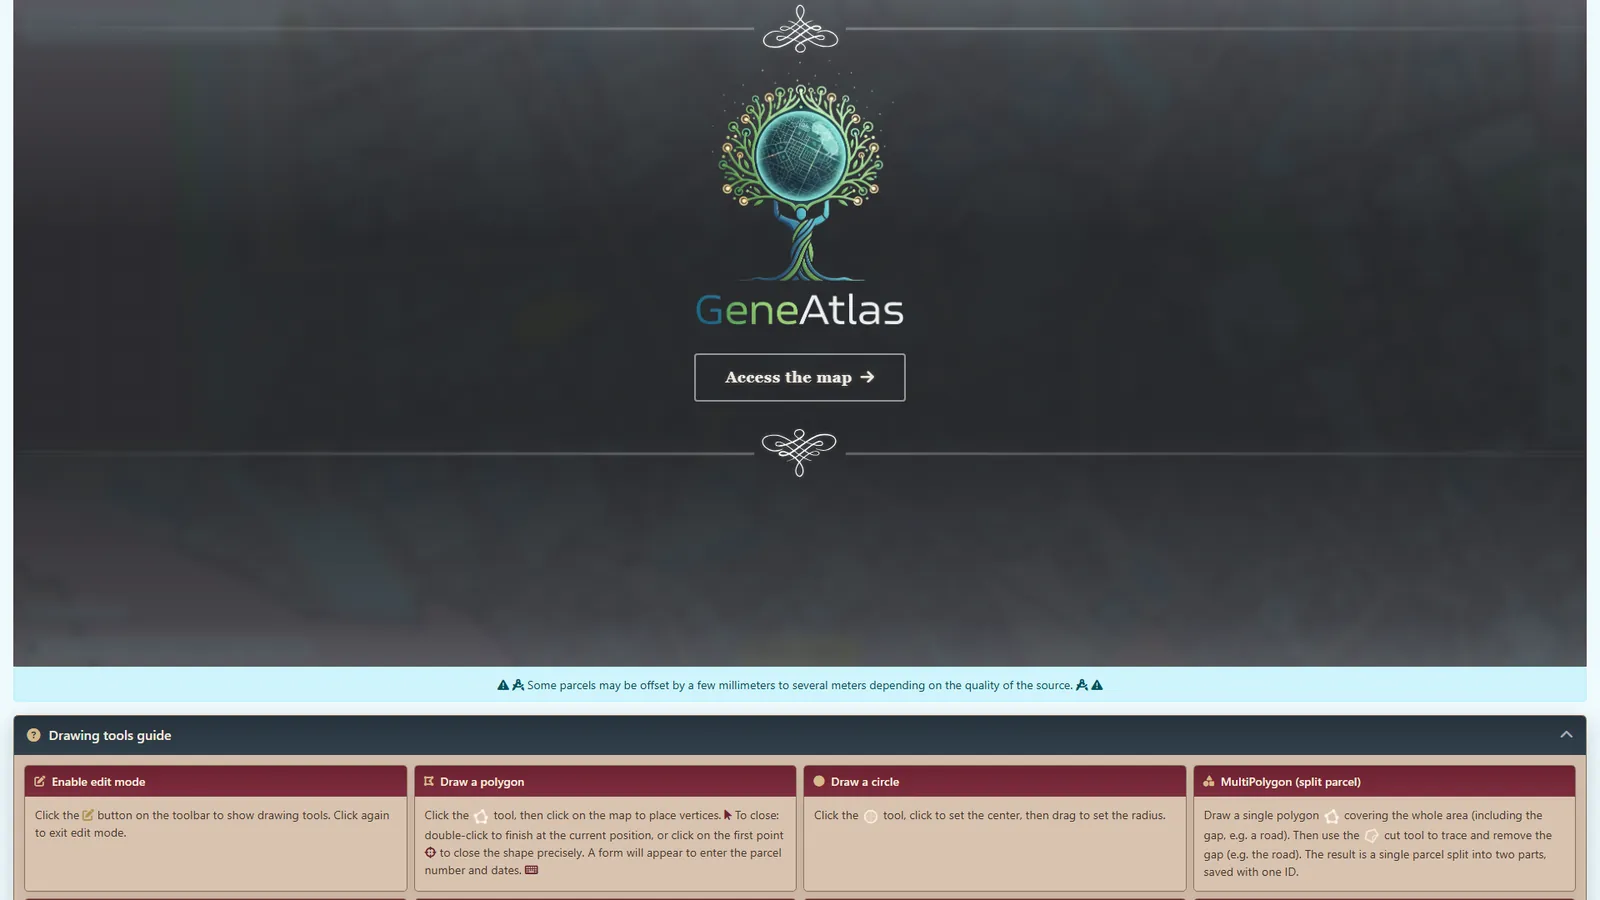
Locate the parcel. In GénéAtlas, browse the georeferenced historical cadastre and trace your parcel straight from the old plan — or start from a number and a place name.
Tip: if the parcel is already georeferenced, click the polygon directly to create the entity from it. If the polygon doesn't exist yet, trace it yourself — your submission goes to staff for review; once accepted, you can create the parcel entity from the approved geometry.
-
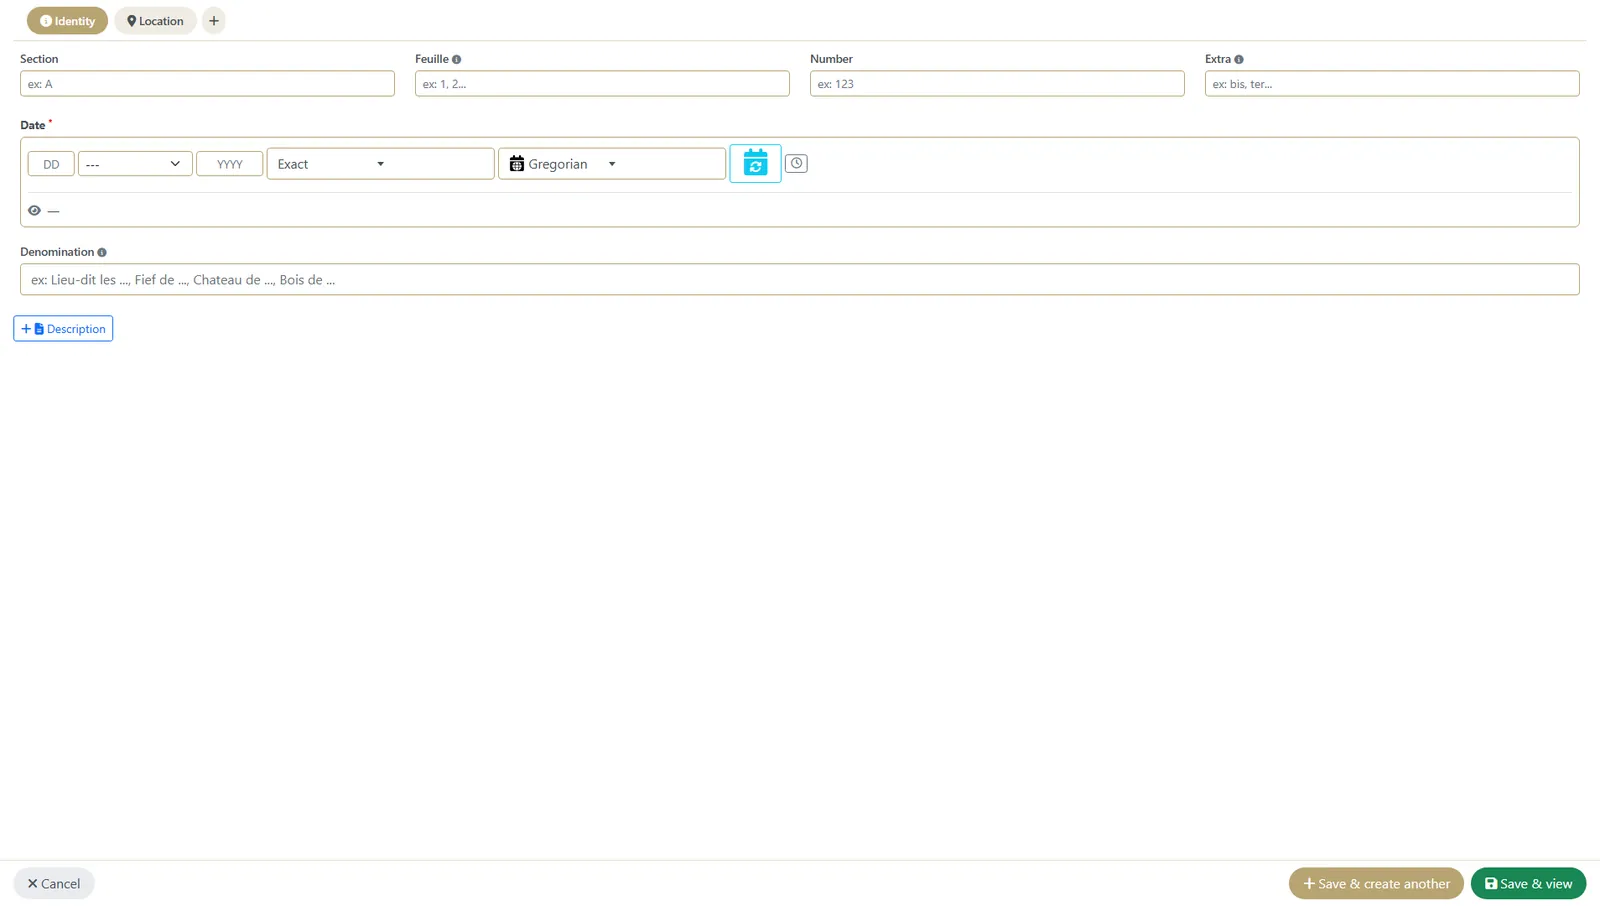
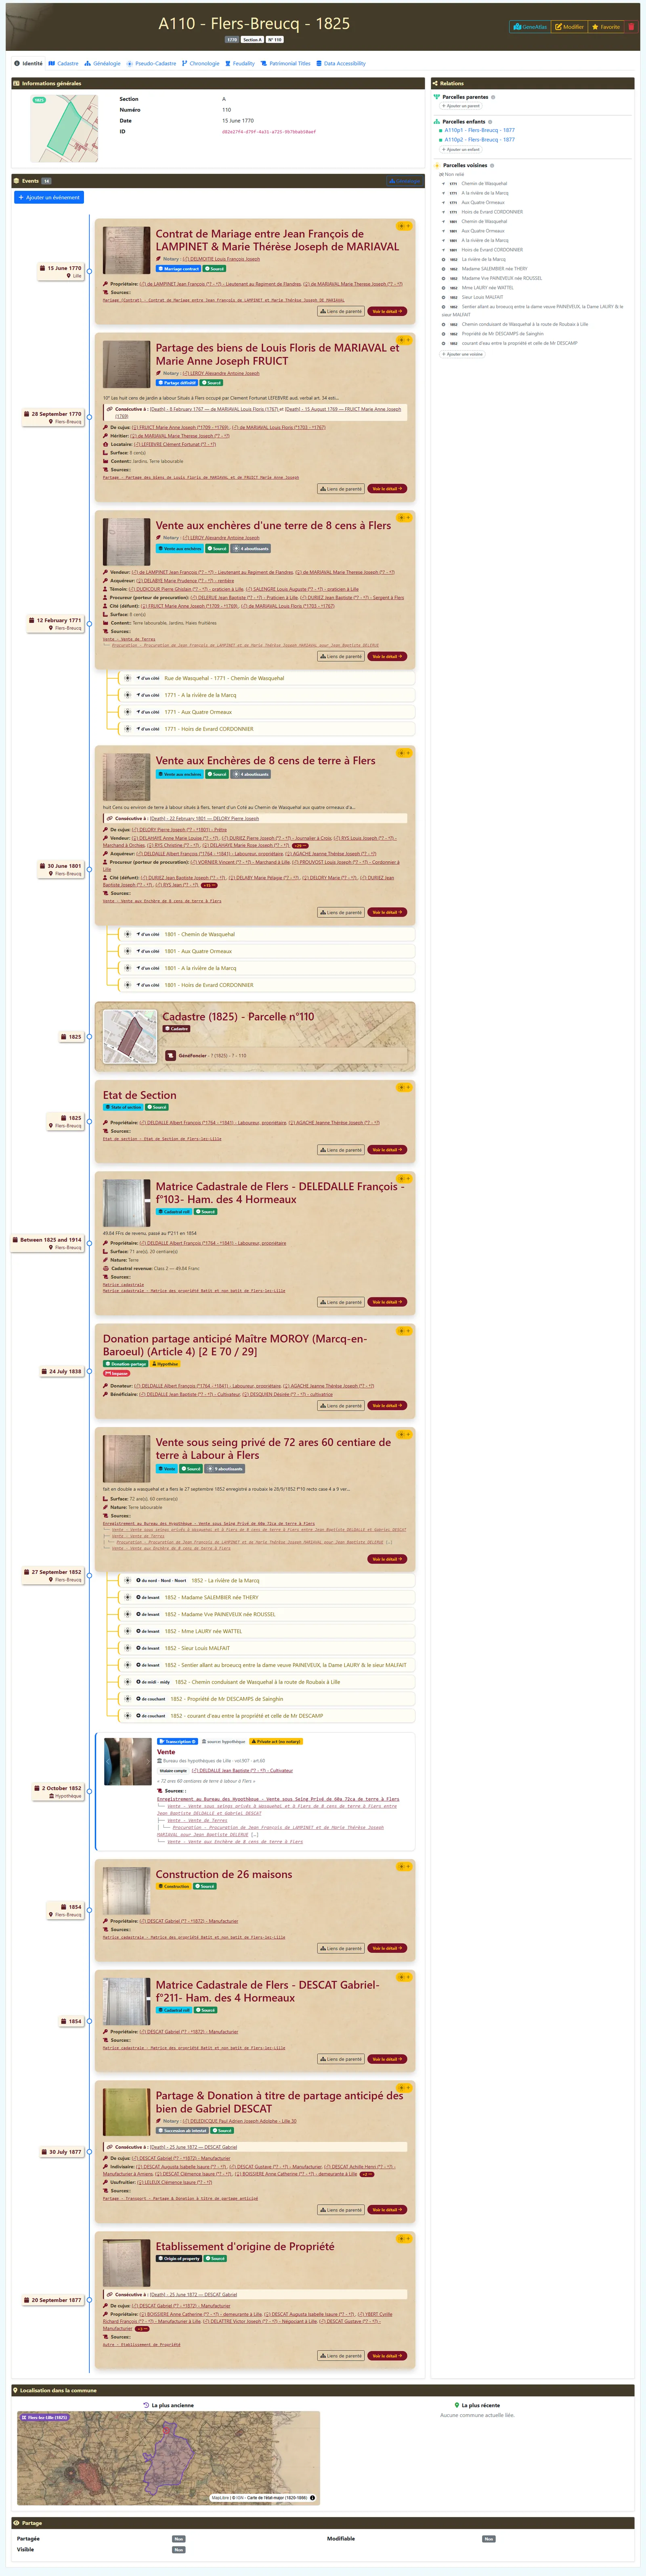
Create the master parcel. The stable record of the property — its identity, place and cadastre reference.
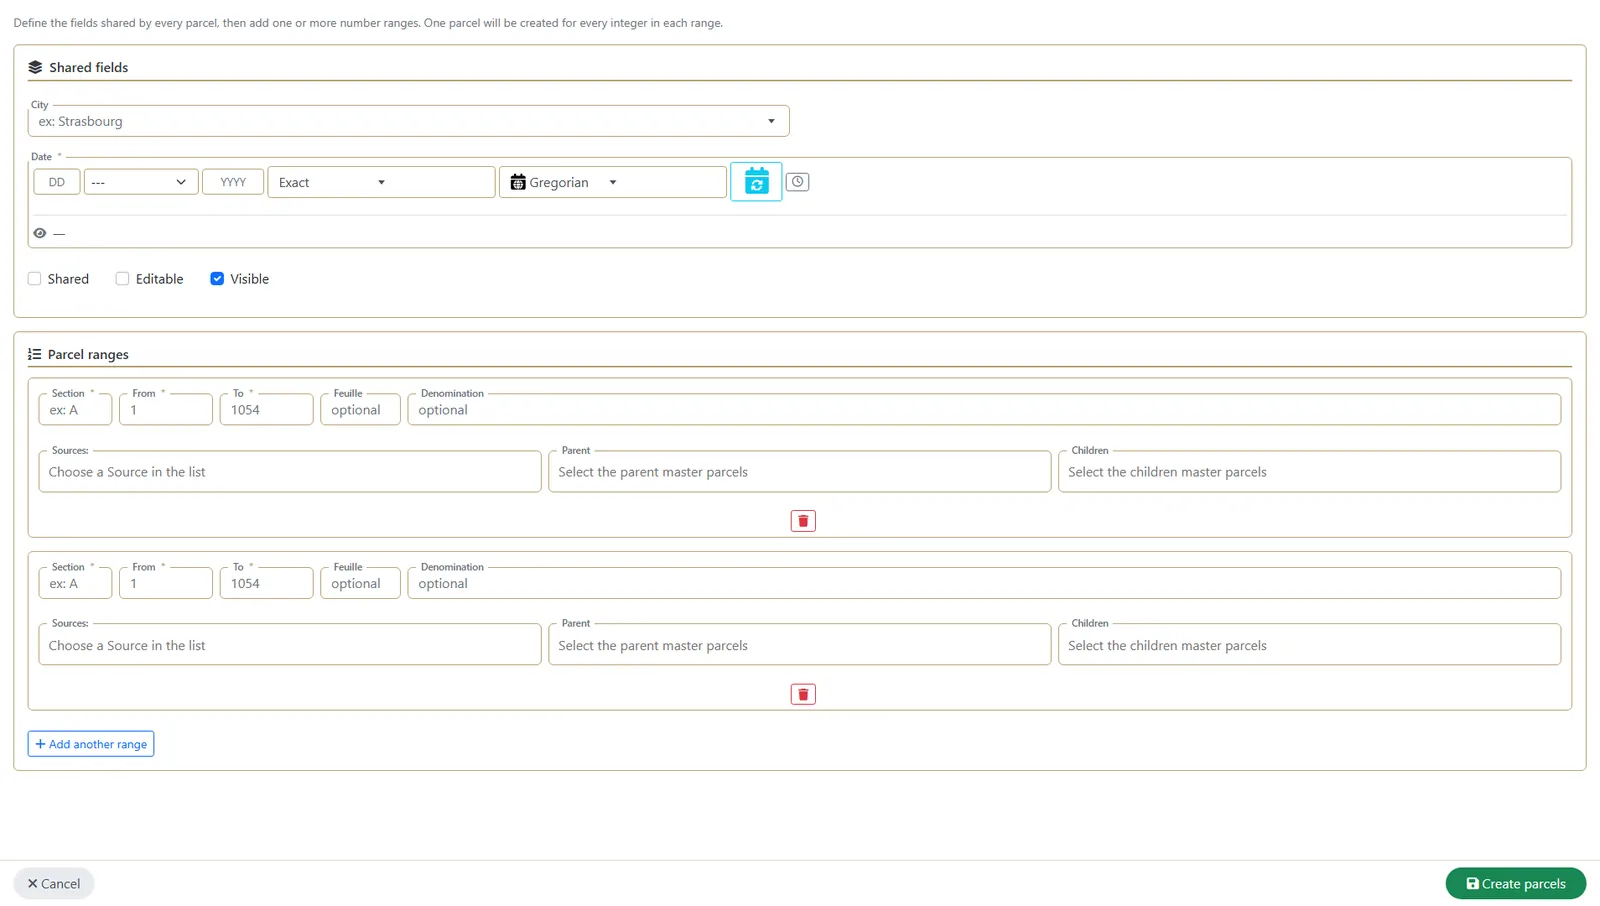
Tip: you can also create directly from the parcel table — use + Create Parcel for a single entry, or + Bulk Create to enter several parcels from the same source at once.
-
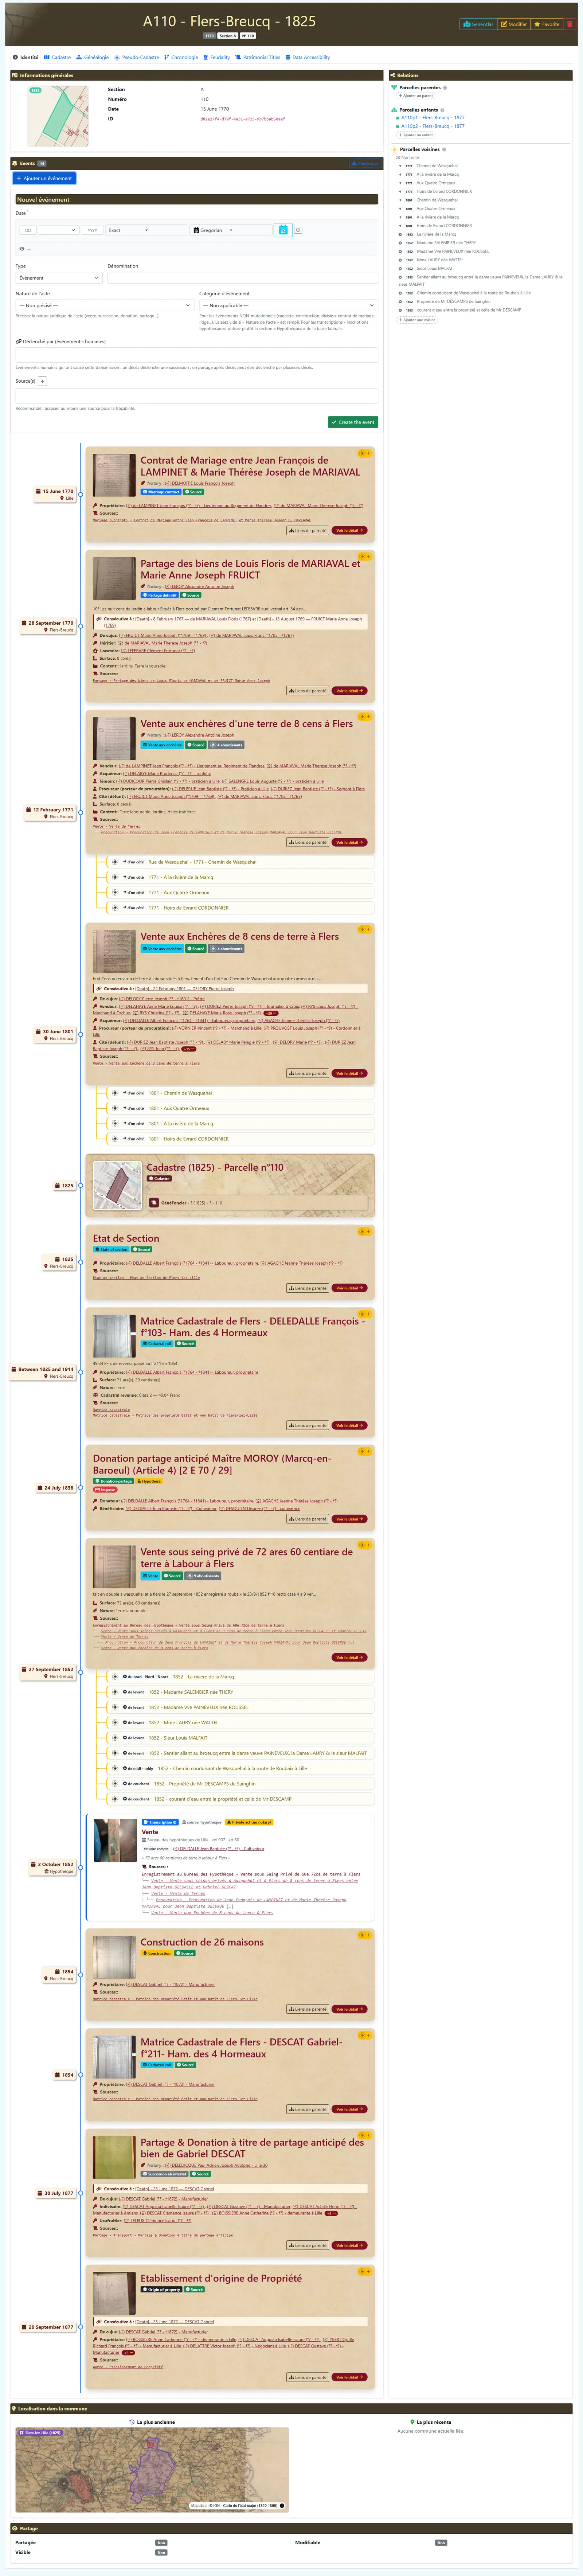
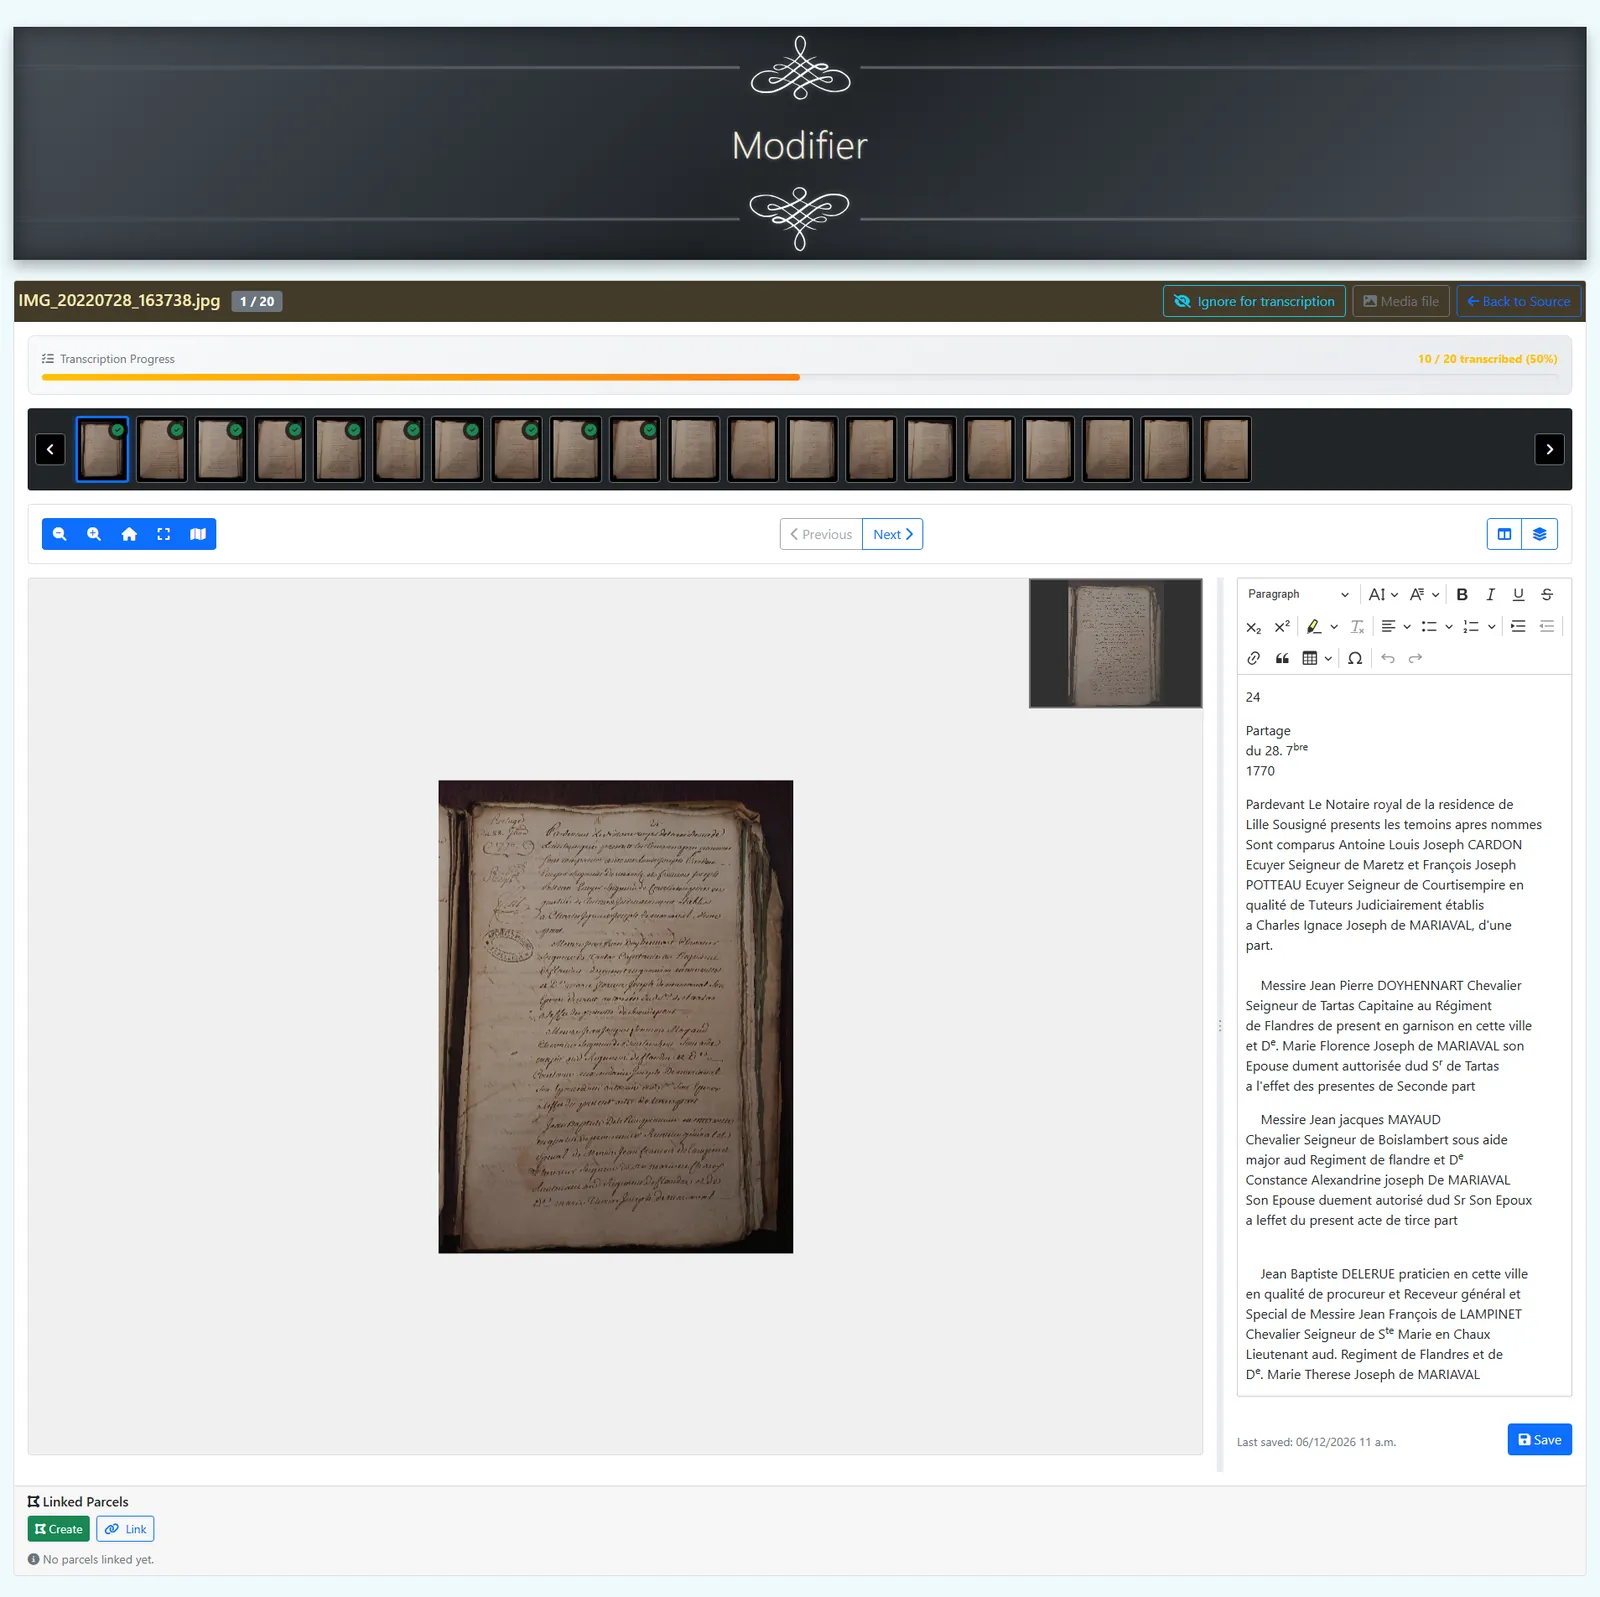
Add its events. Each mutation — sale, succession, donation, partition — is a dated event with its own owners, surfaces and act type.
Tip: you can also create parcel events directly from a source transcription — open the source, navigate to the Transcription tab, and link or create a parcel from the document without leaving the deed.
-
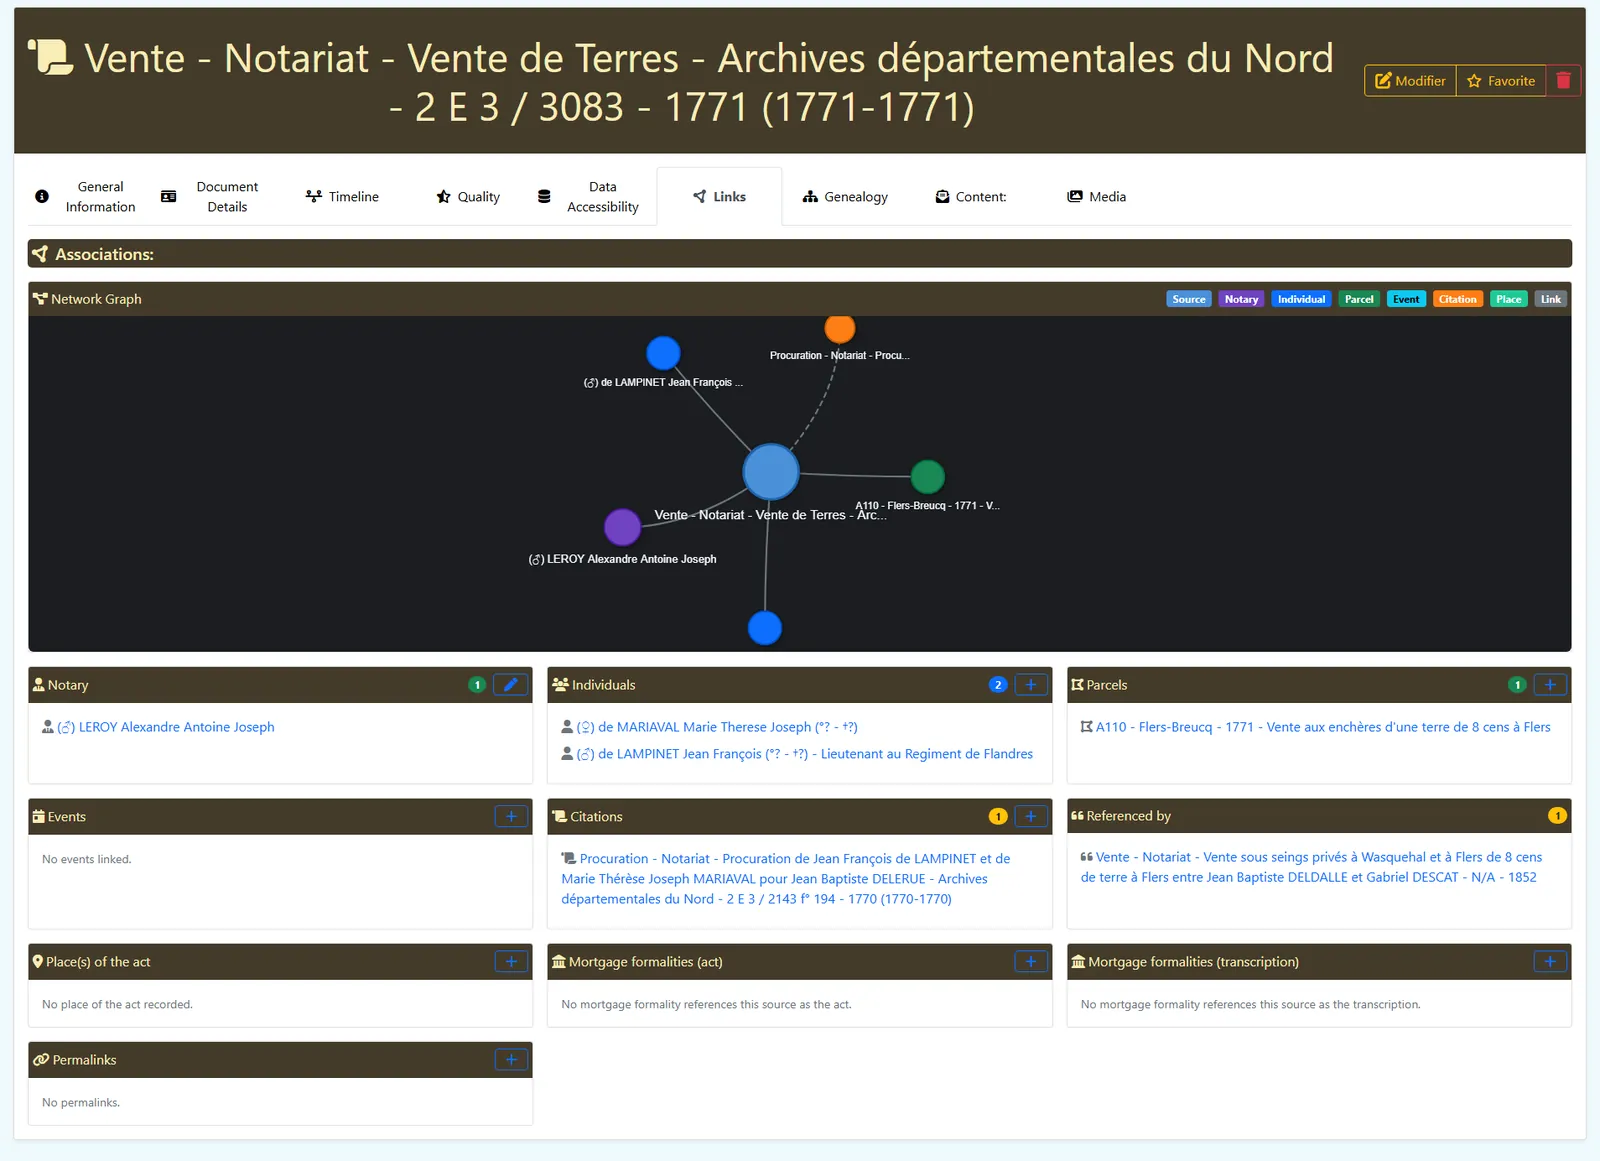
Assign roles. Record who sold, bought, inherited, leased or held it in feudal tenure.
- Add the neighbours. Note the abutting parcels at each date to rebuild the local layout.
-
Cite your sources. Attach the deeds, registers and mortgage formalities (4Q) that justify every step.
-
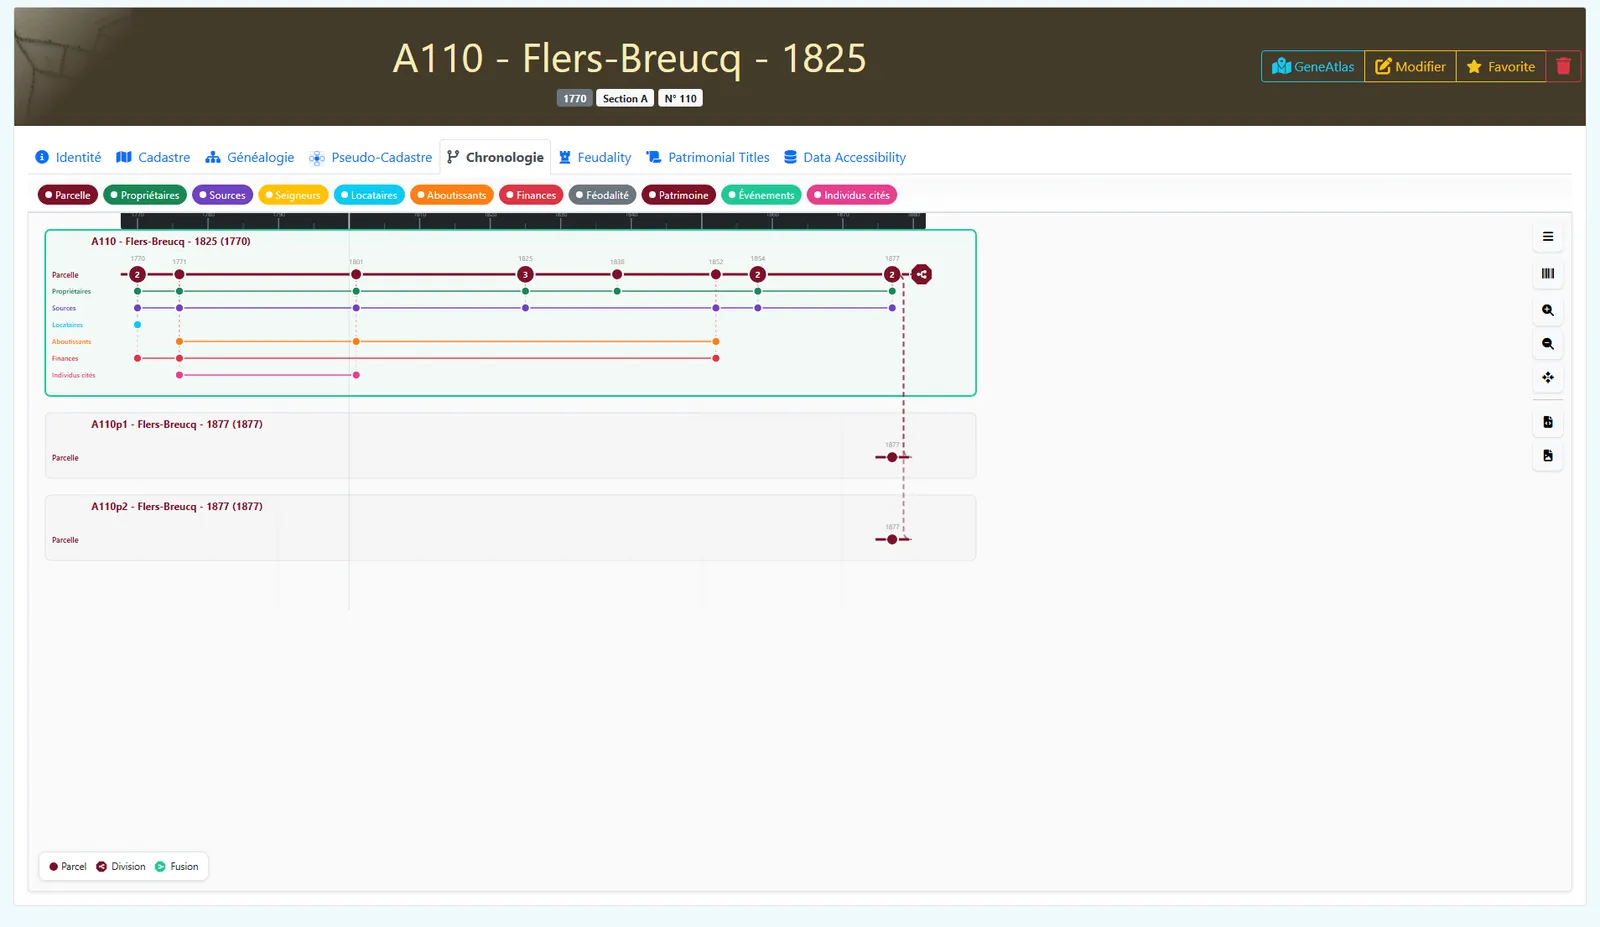
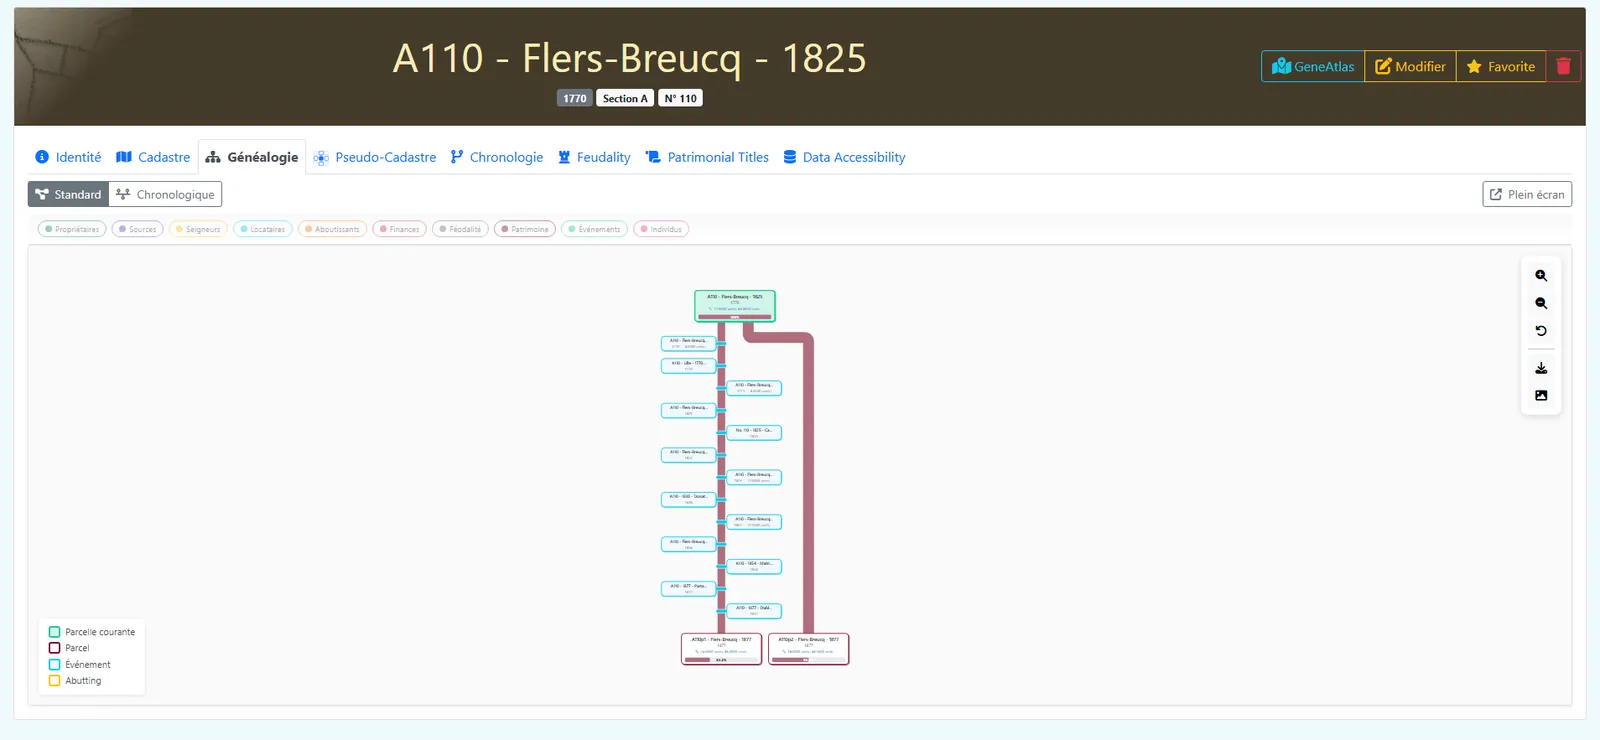
Read its life back. View the parcel as a branching timeline and a genealogy of mutations.
Ready to start?
Sketch the parcel and its mutations in the Studio, or open GénéAtlas to trace it on the cadastre.
Open the Studio Open GénéAtlas